Friday, June 24, 2011

Cooking in Clay Pots


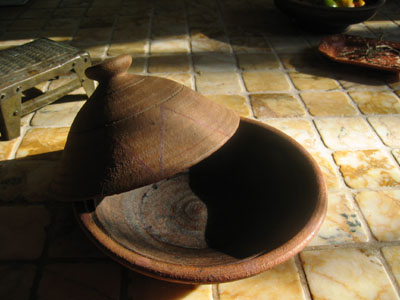
Clay pot cooking has long been known the oldest way of cooking meals. Cooking this way brings out the technique of cooking food in an unglazed clay pot which has been soaked in water so as to release steam during the cooking process. This technique has a long history, stretching back at least to ancient Roman times, and is commonly used in several cuisines in Africa, Europe and Southeast and East Asia.

Today, clay pots and one-pot cookery is making a comeback in the US and home cooks like us are rediscovering how easy they are to use and love the results they are getting.
According to the Romertopf web site, "As a porous material, the clay in a pot that has been saturated with water slowly releases steam from its pores during the cooking process. Juices released by the food as it cooks cannot escape from the pot. This seals in flavor and keeps food from drying out, without the need to add extra fats or liquids. Along with the flavor, essential nutrients and vitamins are retained in the food."

I have no allegiance to any one method of bean cooking and I use all kinds of pots, a pressure cooker and even a slow cooker. I like them all for different reasons.

Cooking beans in clay
But if I have the time, onions and a bag of beans handy, my favorite way to cook is in clay, right on the stovetop. Maybe I'm nuts and maybe the beans do taste better. I'm not going to say for sure, but I've never made a bad pot of beans in an earthenware pot, I always get a dish that's wonderful, rich, layered flavors and sensual melting textures. Truly food tastes better when cooked in clay.

Saturday, June 4, 2011

Cooking Cod in a Pan


Delicately-spiced cod can be perfect served with long grain rice and a creamy sauce. Some flavor it with chili seasonings to make a pleasant change. Vegetarians cater for cod too. Even though some people wonder what is about cod that makes it popularly one of a kind fish, you can be sure that the way you cook cod can conclude with a sweet surprise.

The more you cook with cod the better you will see the various ways you can prepare it and what flavors you like best with it. Don't be afraid to experiment, as it will blend in nicely in a variety of dishes. 

I'm sure you must have been aware of what cod fish is, right?... whether you realize it or not.
Perhaps even with a little tarter sauce and lemon squeeze,  you'll get a tasty fresh cod fish  that will put a really nice twist on your taste buds.

Friday, May 20, 2011

Spanish Style Brined Pork Tenderloin


If we are blessed the sun and sunshine, we have all the freedom and opportunity to enjoy the fresh air. One of the finest thing to do is to invite over some family and friends for a n outdoor bbq! As you gather up, you build a fire in a pit, let it burn down to a bed of coals and cook.  If you're planning for a camping, this is great practice. For those of us who do not have the the yard space for this, the barbecue grill will work pretty well also.  And if it is still cold outside as it is here today, this works on the stove top using a stove top grill. 

Have you tried great tasting smoked meals year round using your stove top when it is cold and windy or on the outside grill when it is warmer. Either way these give you options for delicious smoked meals year round!
Marinating the tenderloin in a mixture of sherry vinegar and sugar mixture gives this grilled pork recipe rich, mellow flavor and the paprika rub adds both color and flavor to the finished dish. 

Ingredients:
  • 3 1/2 cups water
  • 1/4 cup kosher salt (such as Diamond Crystal)
  • 1/4 cup sugar
  • 1/4 cup sherry vinegar
  • 1 cup ice cubes
  • 1 (1 1/2-pound) pork tenderloin, trimmed
  • 2 tablespoons paprika
  • 2 teaspoons sugar
  • 1 teaspoon freshly ground black pepper
  • 1 teaspoon chopped fresh sage
  • 1 teaspoon chopped fresh thyme
  • 2 garlic cloves, minced
  • 2 teaspoons olive oil
  • Cooking spray
  • 2 teaspoons sherry vinegar
 Preparation:

  • Combine first 4 ingredients in a large bowl, stirring until the salt and sugar dissolve. Pour salt mixture into a 2-gallon zip-top plastic bag. Add ice and pork; seal. Refrigerate 3 hours, turning bag occasionally.
  • Combine paprika and next 5 ingredients (paprika through garlic).
  • Prepare grill for indirect grilling, heating one side to medium-high and leaving one side with no heat.
  • Remove pork from bag, and discard brine. Pat pork dry with paper towels. Brush oil evenly over pork; rub with paprika mixture. Place pork on grill rack coated with cooking spray over medium-high heat; grill pork 6 minutes, browning on all sides. Place pork on grill rack over unheated side. Close lid, and grill pork an additional 20 minutes or until thermometer inserted into thickest portion of pork registers 155° (slightly pink), turning the pork occasionally. Place pork on a platter. Cover with foil, and let stand 5 minutes. Uncover and drizzle pork with 2 teaspoons vinegar.

Wednesday, April 13, 2011

Oven-Roasted Chicken

You wouldn't  believe how delicious and juicy a chicken could be until you try this method of oven roasting. Crisp on the outside and moist on the inside. Capable of holding a 8 lb. chicken with room for potatoes and veggies at the base to soak up the delicious juices. The chicken roaster will cook your chicken more efficiently as the stoneware will maintain heat and cook from the inside as well.

Ingredients:

  • Whole Roasting Chicken (2-4lbs)
  • 1/2 an onion
  • 1 or 2 carrots
  • 1 or 2 stalks of celery
  • Several sprigs of rosemary
  • Several sprigs of thyme 
  • 2 cloves of garlic
  • 1/2 T salt
  • 1/2 T pepper
  • 1 T paprika
  • 1 T sage

Preparation:
Preheat oven at 375 degrees Fahrenheit.

Remove giblets from the cavity of the chicken and remove any fat from the area also. Trim any loose skin and remove tail is desired. Rub skin of chicken with a small amount of olive oil and then sprinkle on a mixture of paprika, sage, salt and pepper as rub.


Chop the onion, carrots and celery into 1 inch pieces and place in the bottom of the Chicken Roaster.  Stuff rosemary and thyme into the cavity of the chicken and place the chicken on the spire of the roaster.

Place in oven on second rack from bottom. Roast the chicken for about an hour.  If the chicken seems to be getting too brown, cover with foil and continue.


After 45 minutes or so, stick a meat thermometer in between the thigh and the body. If you have a reading of at least 160 degree Fahrenheit then your roasted chicken is done. If not roast for another 2 or 3 minutes for each degree below 160.  Retest every 10 minutes or so.

Once cooked remove chicken, cover with foil and let it sit for 10-15 minutes. Remove vegetables from roaster dish and serve on the side. Gravy can be made with the remaining juices.

Carve the chicken and enjoy.
 

Thursday, April 7, 2011

The Coolest Clay Pot Cookware


Beautiful Sun-Kissed Tuscany
 The first time I saw Tuscany, I went crazy for the great view and fresh greens everywhere. If I were given the chance to choose where to build another house, I'd say a villa on on one of the Tuscan hills would be great.

Another thing that made me crazy was the terracotta pots that many of the meals were served in. They are just fascinating and perfect for parties, and they are Italian by origin.


When we were on our way to the airport to fly back to the US, I have to pay more for my extra baggage. I couldn't imagine I bought terracotta bakeware pieces that are resistant to over 1500F. I carried a range of sizes and shapes, including ovals, lasagna pans, tall and low casseroles with lids in three sizes, and a large round roasting pan.
 
There are two colors with a tan interior and either a green or blue exterior and lid.The pieces were said to be made from clay quarried in Tuscany and are made specifically for wood-fired oven baking, and are heat resistant and high heat tempered. They are safe for cooking and are lead-free.What intrigued me so much was its ability to manage when used in a conventional oven, or a wood-fired oven. It's 100% food-safe made it a perfect modern cookware to match with my great grandfather's wood oven.

My Tuscan trip was among the best I can say.


Wednesday, February 23, 2011

Have Your Ever Tried to Recreate Dish

Have you ever tried to recreate a dish grandma made? Maybe you have tried making it but you just can't seem to get it just right or even make it taste exactly like grandma's? I don't know but everyone loves turning to the comfort food of home.

Comfort food comes from many places and in a lot different flavors from it's cultural orientation. In the Midwest, comfort food comes by in the essence of gravy, mashed potatoes, pork, or even a thick juicy steak hot off the grill smothered in mushrooms and onions. Down south by New Orleans it comes in the form of Creole shrimp, saffron rice, or even spicy jambalaya. What happens when you take two styles of comfort food and combine them? You get spicy Cajun pot roast!

Here's the recipe.

Spicy Cajun Pot roast
  • 4lbs- boneless chuck roast
  • 2- white onions (1/4 inch thick cut in 1/2 moon shapes)
  • 2- green peppers (1/4 inch thick cut in 1/2 moon shapes)
  • 2- jalapeños (minced)
  • 3- cloves garlic (minced)
  • 2- caribe peppers (minced)
  • 16- baby red potatoes (cut into fourths)
  • 2c- beef stock
  • 2c- cajun or creole seasoning
  • 1c- slurry (corn starch and water mixed together)
Pre heat oven to 300 degrees. Rub the chuck roast down with Cajun or Creole seasoning well, massaging it for about 5 minutes working in the meat. Then let stand for 1 minute. In an oven safe Dutch oven pot or a 4 to 5 quart sauce pot sear the roast well on all sides, making sure to lock in all the great cajun flavor. Add your peppers, onions, potatoes, and beef stock to deglaze the pan and release the flavors from the bottom of the pot. Cover the pot and slide into oven. Bake at 300 degrees for 3-5 hours or until the roast and vegetables are fork tender.
Remove from oven and place roast onto serving platter to rest for about 10 minutes. Strain out vegetables and place around roast while preserve liquid on stove top. Bring liquid up to a simmer. Once simmer whisk in your slurry to thicken the liquid. It should start to take on a gravy consistency. At this point you can add more Cajun or just salt and pepper to the gravy to spice it up. Just before service, ladle Cajun gravy over roast.

Enjoy!


Thursday, February 10, 2011

The Delicious Italian Rice Dish Risotto

I'm sure we are all familiar of the rice dish risotto. It's Italian and carrying culinary Italian cuisine name means it is one of the most fabulous Italian dishes.

If you use a short grain variety like Arborio rice when making your risotto, then you making a perfect risotto. Arborio is the most popularly used short-grain rice variety that Italians love for their risottos. This rice has the capacity to absorb large amounts of liquid while keeping its shape. The starchy rice when combined with the stock during cooking creates a fantastic soupy sauce giving risotto its smooth, velvety and creamy appearance.

Risotto is made by sautéing rice in oil or butter, onion and garlic then adding ladles of hot stock at a time while constantly stirring, until the rice absorbs the stock. This process is called toasting the rice which is important so the rice can absorb liquid more quickly. It usually takes about 20 to 25 minutes to cook a risotto from all the constant adding of stock and stirring, without producing a mushy rice dish.

Traditional risotto has only around 6 basic ingredients. Along with its basic ingredients oil, onion starchy rice, hot stock and cheese, a risotto can be made using many kinds of vegetables and legumes, meat, poultry, seafood, fish and any type of wine and cheese. You can even include berries or any fruit of your taste.

Here is one of the most famous Italian Risotto recipe that you could try for dinner: It's called Milanese Risotto.

Ingredients:
(serves 4)

  • 1 litre salt-reduced chicken stock
  • Pinch saffron threads
  • 1 tablespoon olive oil
  • 1 medium brown onion, finely chopped
  • 2 garlic cloves, crushed
  • 1 1/2cups arborio rice
  • 1/2 cup dry white wine
  • 1 cup frozen peas
  • 1/3 cup finely grated parmesan cheese
  • 20g butter, chopped
  • Finely grated parmesan cheese, to serve

Procedure:

Place stock and saffron in a saucepan. Cover. Bring to the boil over high heat. Reduce heat to low. Simmer until needed. Heat oil in a large cast iron pan over medium heat. Add onion and garlic. Cook, stirring, for 5 minutes or until softened. Add rice. Cook, stirring, for 1 minute. Add wine. Bring to the boil. Boil for 1 to 2 minutes or until wine is reduced by half.

Add 1/3 cup stock to rice mixture. Cook, stirring, until stock has absorbed. Repeat with remaining stock, adding 1/3 cup at a time, until all liquid has absorbed and rice is tender and creamy, adding peas to rice mixture with final 1/3 cup stock.

Cook for 5 minutes or until peas are heated through. Remove from heat. Stir in cheese and butter. Season with salt and pepper. Serve topped with cheese.

Enjoy!

Monday, February 7, 2011

One Dish Dinners Made Easy

One dish dinners are the most ideal solution to weekday meals when time is at a premium. If you're a beginner, you will find these meals a boon, while those with simple dinner notions will appreciate the fact that not too many work is required by way of utensils and cookware.

Find these recipes that you can make from your fresh or frozen as well as storecupboard ingredients and leftovers. This is a made-in-minutes main course with vegetarians in view.


Pasta Twists with Mushrooms and Tomatoes


Ingredients

- 2 cups dried whole-wheat pasta spirals
- 2 tsps olive oil
- 4 tbsps corn oil
- 1 onion
- 21/2 cup mushrooms
- 4 large tomatoes
- 31/2 ounces process cheese slices
- 4 tbsps minced fresh parsley
- salt
- freshly ground black pepper
- 1/2 cup heavy cream

Procedure

Grease a fairly deep casserole. Preheat oven to 400F.
Bring a large saucepan of lightly salted water to a boil. Add the pasta and olive oil and cook for about 10 minutes or until just tender. Drain pasta. Set aside.

Chop onion. Wipe mushrooms and slice thinly.

Heat half the corn oil in a large skillet. Add onion and saute' for 5 minutes or until softened or pale gold. Stir in rest of corn oil. Add mushrooms and saute' for 3 minutes more.

Cut a small cross in each tomato. Put into a heatproof bowl. Cover with boiling water.
Let stand for 1 minute. Rinse under cold water. When cool enough to handle, slip off skins. Slice tomatoes.

Layer prepared dish with pasta, sauteed onions and mushrooms, sliced tomatoes, half the cheese and half the parsley, sprinkling salt and pepper between the layers.

Trickle in the cream, top with remaining cheese slices and bake uncovered for 20 minutes. Garnish with rest of parsley and serve at once.

For non-vegetarian, serve with broiled bacon or sausages.

The Healthy Terracotta Cooking

Terra Cotta is a clay pot. Knowing that wet clay is a porous material, a slow evaporation of steam from within the pores of the clay happens when the pot is saturated with water and put into the oven. This allows the food to produce its most natural juices that cannot escape during the cooking process. As soon as the pot becomes dry, your food is cooked.

Because wet clay does not become as hot as metal once put into fire, it is important to cook at higher temperature (450F instead of the usual 350F). The manufacturers of clay pots recommend to always put the pot in a cold oven.

The benefits of Cooking with Clay Cookware are understood by many cultures from around the globe. But Italian made Piral terracotta cookware with its easy clean glass-like cooking surface is easily the most versatile and beautiful.

Clay Pot Cookware carry Elegance

Clay Pot Cookware Today Comes in Attractive Colors

Now, more than ever, a large section of society seems to be embroiled in the issues of healthy eating. While the fast food industry reels from a salvo of criticism, mainly from the health and medical professions, an old-fashioned cooking method is quietly but steadily gaining in popularity.

Thursday, November 25, 2010

Big Holiday Promotional Prices for Chef's Knives at Your Smart Kitchen

I always put so much time watching out for big promotional sales for kitchen items just before the holidays of every year, and it makes me excited about finding the best picks for gifts we can give away.

One of my favorite online stores Your Smart Kitchen where I've actually bought some of my kitchen pieces hasn't came back to full operation yet, most probably the site is undergoing some improvements, but I was so keen about finding it's latest offers and thanks heavens I was among its newsletter subscriber, I found about their latest holiday surprise!


Profession Chef's Knife 6.3 inches
The retail price which was normally close to $100 offered at $85, now only $62.00


Perfection Chef's Knife 6.3 inches
Typical retail over $100 being offered at $88, now price is $65.00

They also offer a holiday Profession and Perfection Duos of two Fissler cutlery lines that you should take a look:

Profession Duo

Carving Knife 7.9 inch
Chef's Knife 7.9 inch
Retail $263 Promotional price $185.00


Perfection Duo
Carving Knife 7.9 inch
Santoku Knife 7.1 inch
Retail $282 Promotion price is $198.00

Since Your Smart Kitchen web site is not operation in the meantime, to order these products you can use one of two processes:
  1. Order direct through Pay Pal with payment going to yogiwan@gmail.com State in the comments section which product you are ordering and your shipping address. Pay Pal will take all credit cards.

    Email your request to chef@yoursmartkitchen.com and include payment and shipping information.
I don't know if you have as much excitement as I have for these promotional offers, it's just that there's nothing like spending time and money in a store that's worth your click, and it's always best to share the things I feel like worth sharing. If you're like me, this could be your chance to enjoy them too!

So, happy shopping and Happy holidays from my family!


Monday, November 15, 2010

Cutting Edge

Did you know that the knife is the most important tool in the kitchen? It's hard to prepare a recipe without a slicing and chopping, just two of the main actions that a well-sharpened knife can take care of. If your repertoire requires deboning, filleting and pairing, that's where your need to decide to whether get yourself a good set of a cutting edge.

Let's talk about the most basic knives your kitchen must have:

A chef or a cook's knife - most suitable for your slicing and chopping needs. This knife is usually between 8-2 inches long that has a wide blade.

Pairing knife - is a small knife about 2-4 inches long that is basically used for smaller cutting actions. An example of this is peeling fruits and vegetables.

Bread knife - if you are very fond of serving bread, this long knife with a serrated blade is very ideal for cutting through the crust and delicate body of your loaf breads.

In choosing a knife, I suggest that you always get one with a one-piece construction from tip of the blade to the end of the blade, for a very durable choose. Choose one that you find comfortable in your hand. To make your knives last, keep them in a knife holder with slots. Do not use your knives for opening cans or bottles, as this can break the tip of your knife's blade, and most of all always cut on a chopping board.

I hope I have given you the best basic tips from choosing to handling your knives.

Tuesday, November 2, 2010

Planning The Holiday Budget

If the most symbolic item on the menu for Thanksgiving is the turkey, perhaps this can also be great for the joyous season, Christmas!

Planning the holidays on a budget does not need to sacrfice flavor in your food. If you are wondering how to cook very juicy and moist turkey, or your favorite meats that can be trimmed of all fat, producing flavorful and even browned finish, without so much hassle, look no further than the clay baker. We know that when it comes to roasting tender dishes from poultry to fish, and even desserts, Mom said the clay bakers are our perfect companion.

Romertopf and Shclemmertopf are what I believe the two most leading brands of clay bakers. You can even think of converting your bread recipes for clay baking and get your own rise crunchy crusts too... There are many clay baker recipes online that can provide you with different dishes in different flavors.

The next thing is to stay away from non-seasonal items, they are almost always expensive. Don't be too impulsive in your grocery shopping. Farmers' markets are a good choice where you can buy seasonal produce in big quantities. They are cheaper and most importantly, fresher, so you can translate these foods to simple recipes that are more flavorful and healthy.


Thursday, October 28, 2010

My Most Typical Cooking Range

Are you one of the 58% American households using electricity for cooking?... or you belong to homeowners who preferred the greener way of cooking food?

Manufacturers have taken the art of making efficient, economical and highly-versatile cooking range designs to meet the standards of pleasurable cooking. Some cooking range models run on gas, others run on electric ranges, and a few ones run in a combination of both. But among the traditional stoves, cooking ranges are the most convenient and energy-efficient.

Freestanding ranges for the most part are more economical to purchase than any other type of cooking range, it is perhaps a cooking lover's dream. It contains the highest power burner on the market, for the most efficient cooking experience possible. It works well for lighter cooking with its simmer burner which helps prepare the most delicate of sauces and soups.

I have felt for a long time that the double oven freestanding range is one of the best innovations. I think it's very practical. But my favorite range has long been the one handed to me by my Mom, a natural gas range top. It may have been old but perhaps I had my share of a greener cooktop since I've been cooking on this one. (Not so sophisticated though, but at least I always create good food.) I really enjoyed using the range, and even though I have it already, I really wanted to buy a sophisticated one for myself.

Monday, September 20, 2010

A gastronome meal always begin with a quality cookware. It is just basic.
Whether you use copper, aluminum, cast iron οr stainless steel, quality must be foremost. Thе cookware οf best quality wіll certainly take care of healthier meals, and no matter what you need to do, having professional quality cookware will mean that your pots and pans are up to the job. Perhaps you often accidently let things boil dry or boil over when you get distracted. You'll know that your pans will still give you the performance you need, every time.

Cooking a meal from fresh and quality products in a cookware with excellent cooking ability, is the secret to preparing quality meals. It's a lot easier if you have all the right tools before you start cooking. However, many people overlook the important role that quality cookware plays in helping make a dish go from good to great. Most refuse to see that the first factor to be considered in quality cooking, is the material in which the cookware is made.

No cookware may be considered as the most perfect, as each cooking preference vary from individual to indidual, but it still pays to choose quality cookware if you want quality meals, and if you want a set that can last a lifetime.